DreamForge Guide

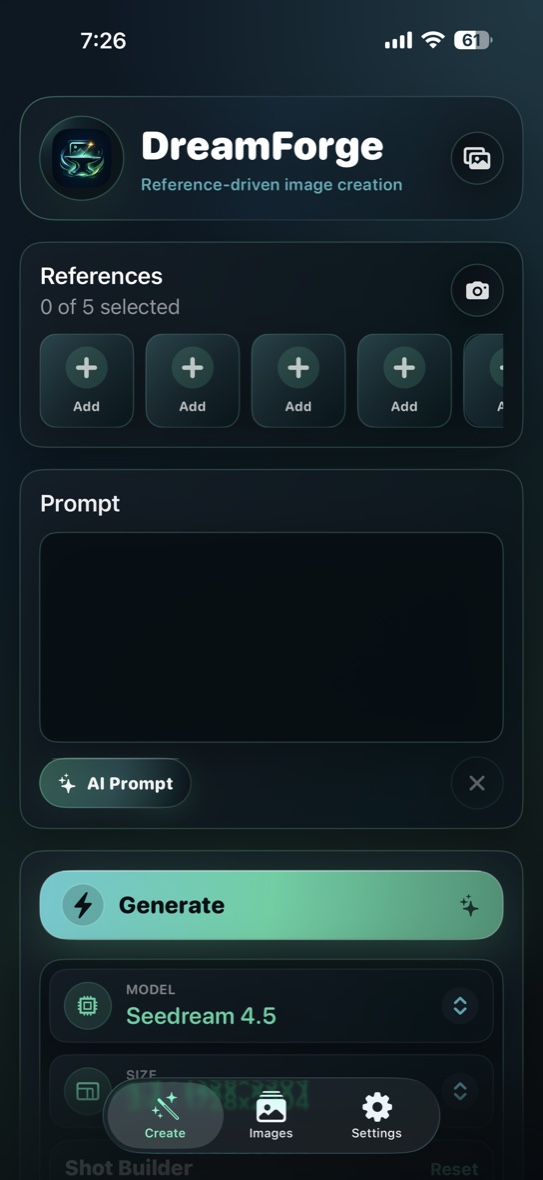
DreamForge is the mobile control surface. Your ComfyUI server is the engine doing the generation, routing, partner API calls, and upscaling. This guide walks through the cleanest way to connect the two and keep creating from iPhone or iPad.

DreamForge Create screen DreamForge server settings screen
ComfyUI stays yours DreamForge sends selected prompts and references to the server you configure.
Quick Start

Five steps to first generation.

If ComfyUI is already installed, this is the shortest path from server launch to a generated image inside DreamForge.

01

Start ComfyUI

Run ComfyUI so it listens on your network instead of only on localhost.

02

Enter Server URL

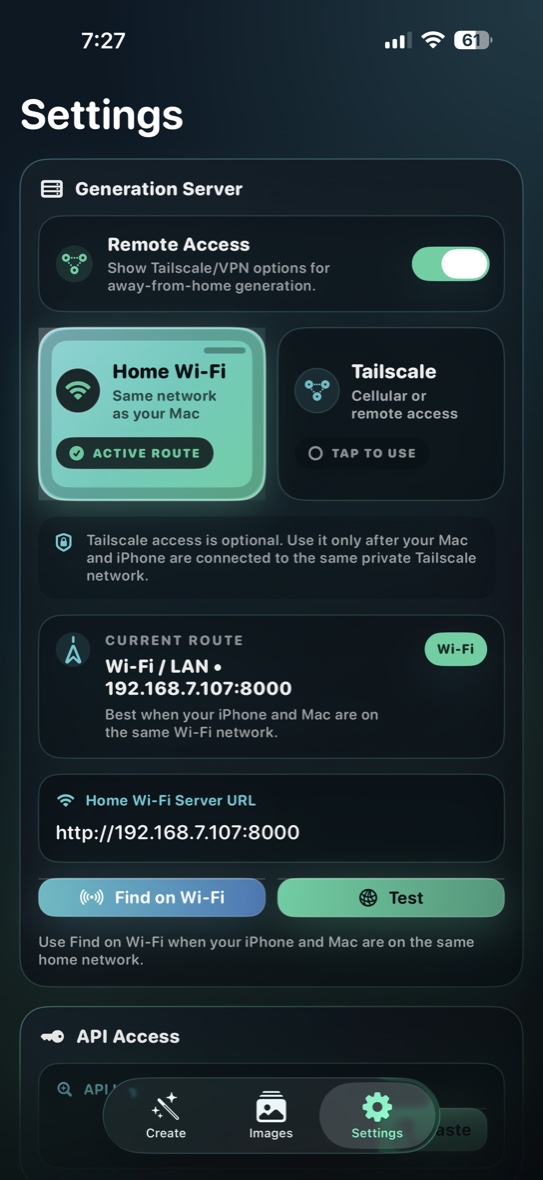
Add your Wi-Fi or Tailscale URL in DreamForge Settings.

03

Test Connection

Use Test before creating so you know the phone can reach the server.

04

Import Images

Bring in references from Apple Photos or the Wi-Fi Import website.

05

Generate

Add references, write a prompt, choose model and size, then tap Generate.

Recommended launch command

Use this when starting ComfyUI from the machine that will serve DreamForge.

python3 main.py --listen 0.0.0.0 --port 8000 --enable-cors-header "*"
How It Works

A mobile app for your own image engine.

DreamForge does not include ComfyUI inside the app. It connects over Wi-Fi, Tailscale, or another trusted private route to the ComfyUI server you run.

iPhone or iPad DreamForge
Your machine ComfyUI Server
Generation Partner API or Local Workflow
Image returns to DreamForge
Connect ComfyUI

Home Wi-Fi is the easiest setup.

Use this route when your iPhone or iPad and the Mac running ComfyUI are on the same local network.

Home Wi-Fi example http://192.168.7.107:8000

Do not use 127.0.0.1 on a real iPhone or iPad. On the device, 127.0.0.1 means the phone or tablet itself, not your Mac.

DreamForge settings for ComfyUI server connection
DreamForge settings with API key, privacy, and storage controls
Remote Access

Use Tailscale when you are away from home.

Remote Access is designed for private routes like Tailscale. Wi-Fi scanning does not scan Tailscale, so enter the exact Tailscale URL manually.
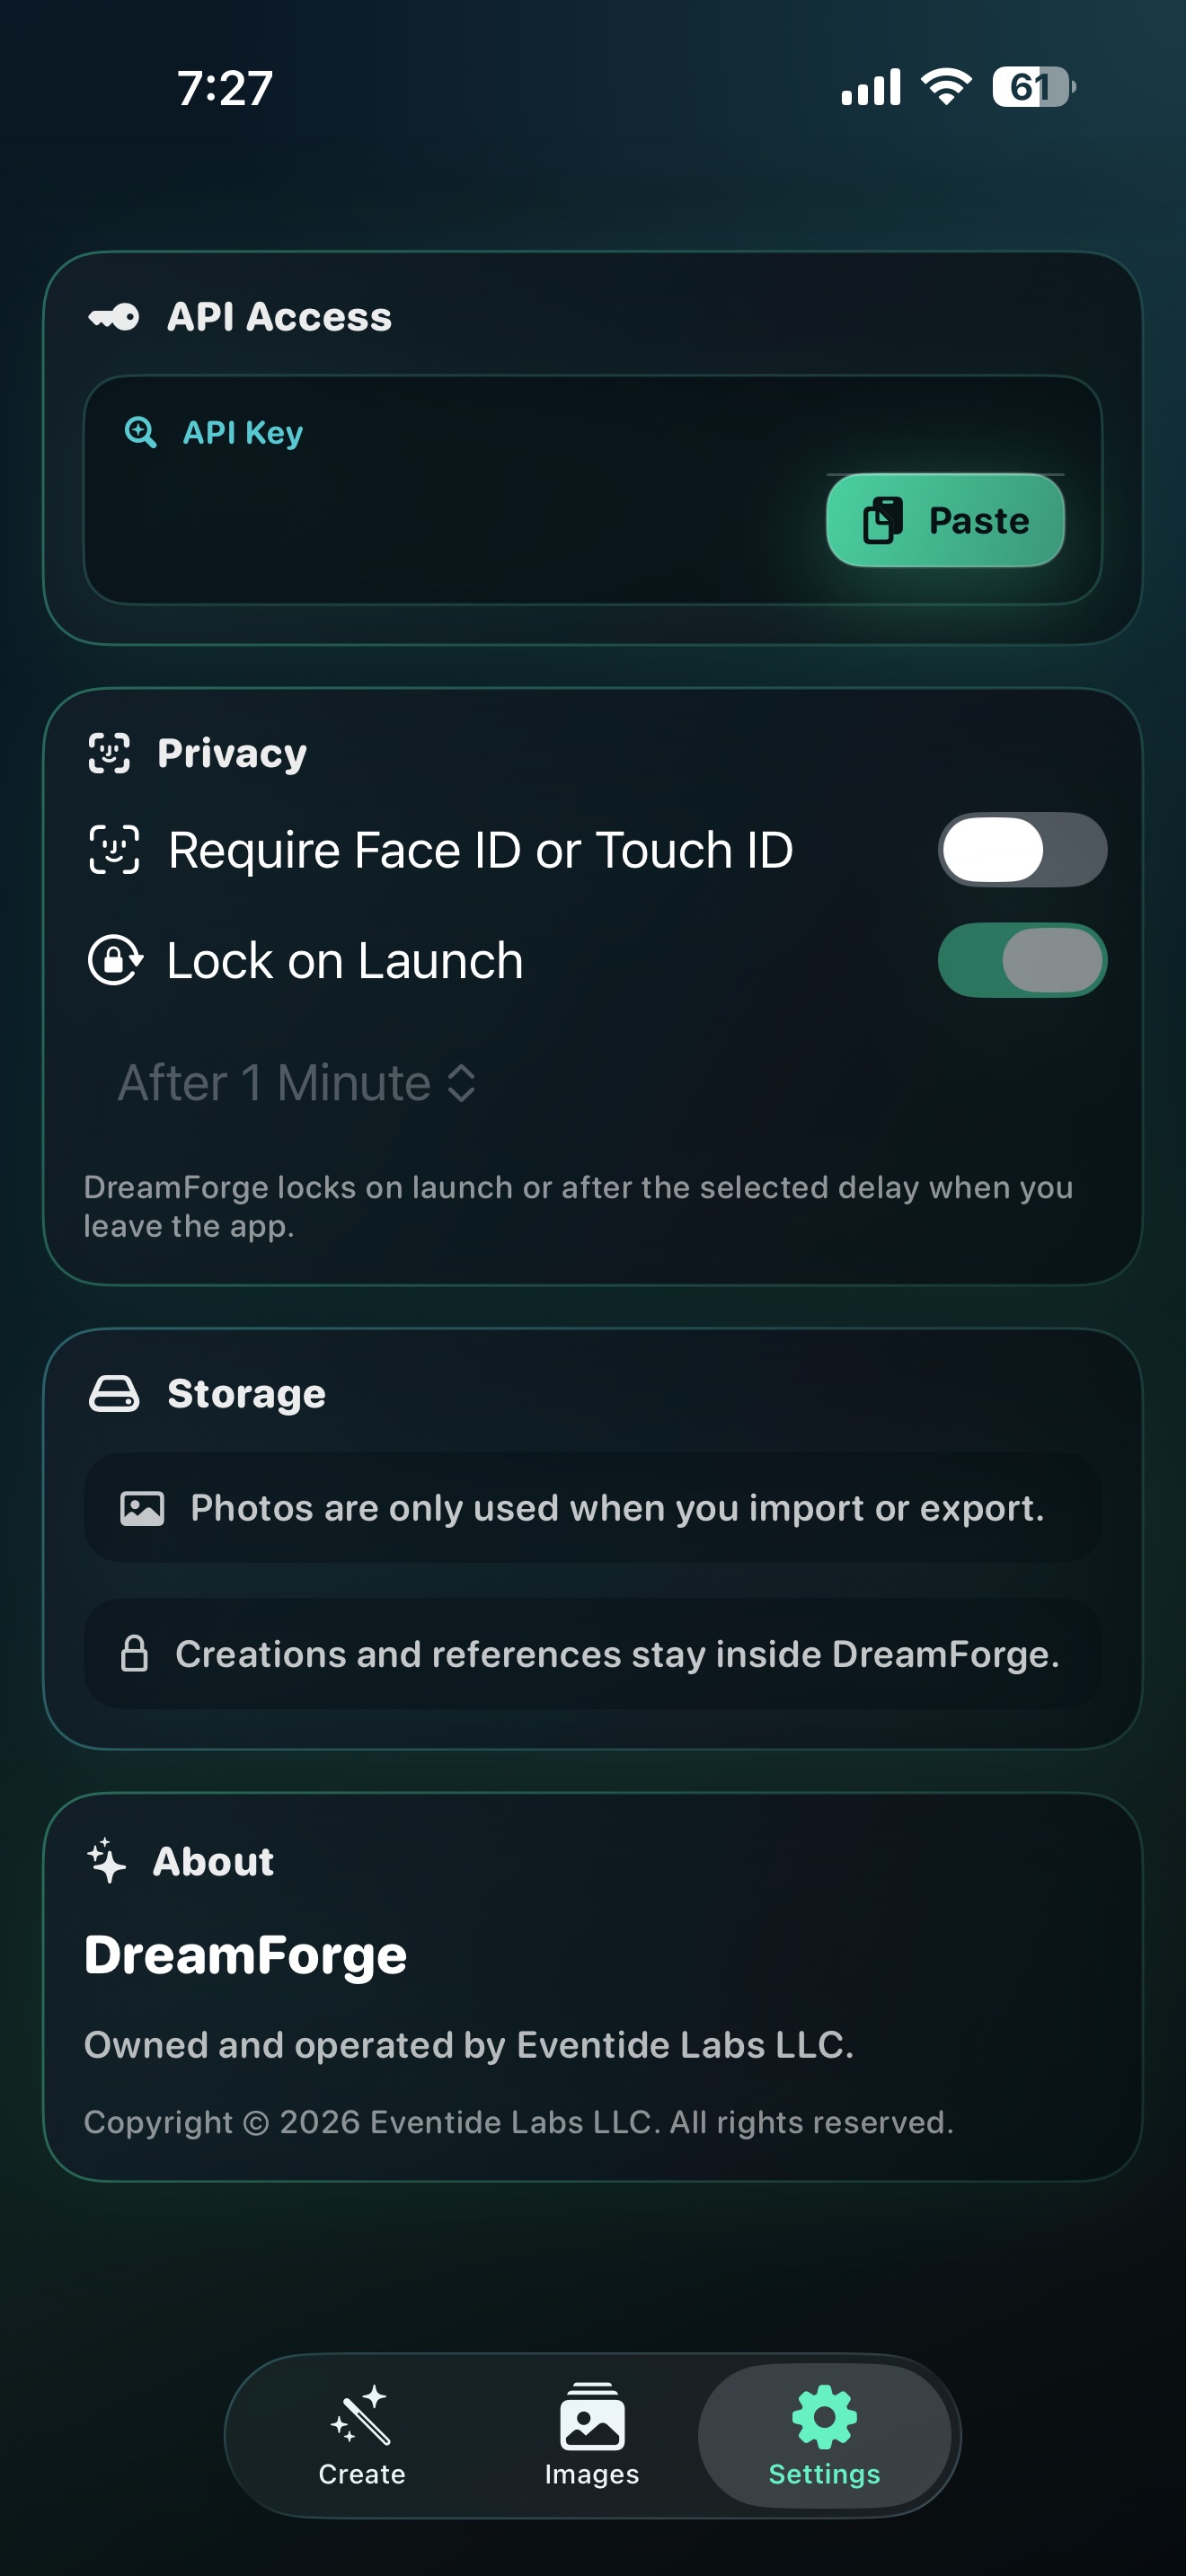
  1. Turn on Remote Access in DreamForge Settings.
  2. Choose Tailscale.
  3. Enter the Mac's Tailscale URL: http://100.92.190.92:8000
  4. Open the same URL in Safari first to confirm the route works.
  5. Return to DreamForge and tap Test.
Import Images

References live inside DreamForge.

Importing from Apple Photos or Wi-Fi copies images into DreamForge's own app library. Photos is not used as the active working library.

DreamForge references area

Reference library

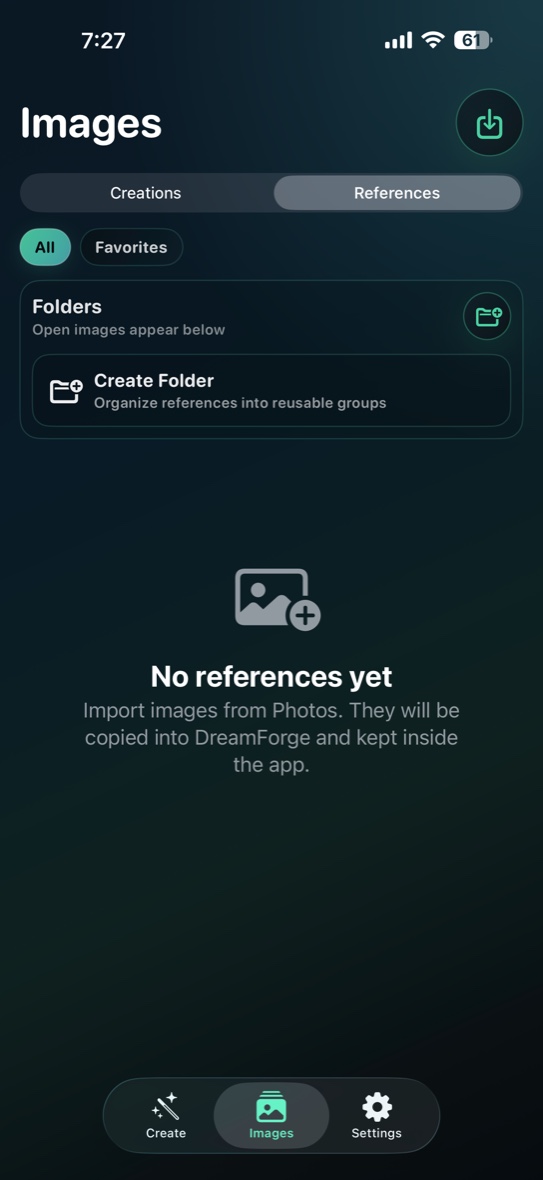
Use imported images as reusable visual inputs without mixing them into creations.

DreamForge creations area

Creation library

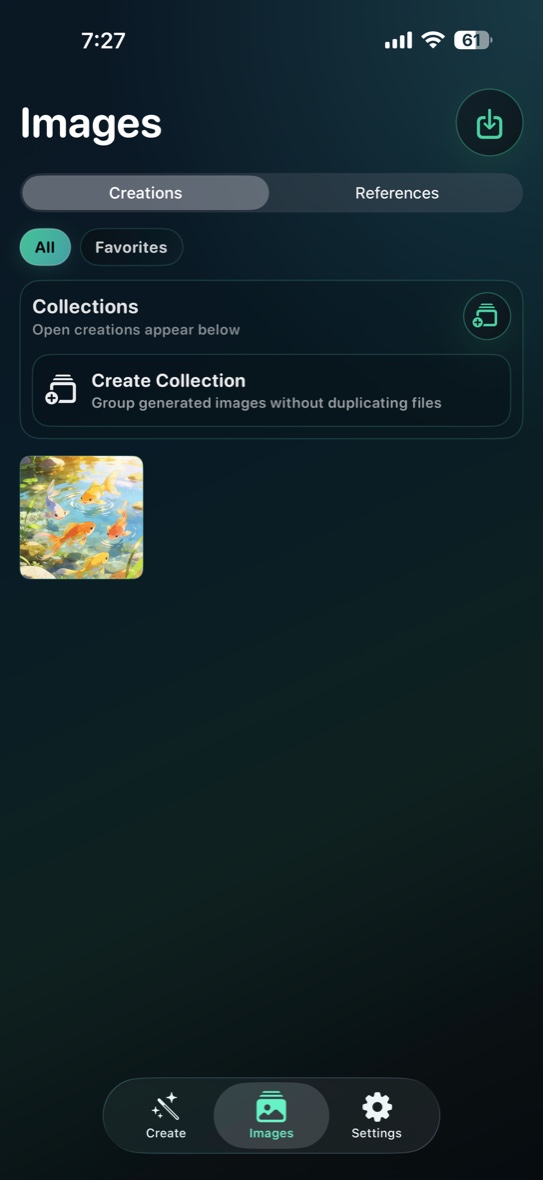
Generated images stay organized separately so finished work is easy to review.

Apple Photos

DreamForge accesses Photos only when you choose to import or export.

Wi-Fi Import

Start a temporary import website from the app and send images from another device.

Private App Library

Imported files are copied into DreamForge so your working library stays contained.

Create With References

Prompt, references, model, size, shot language.

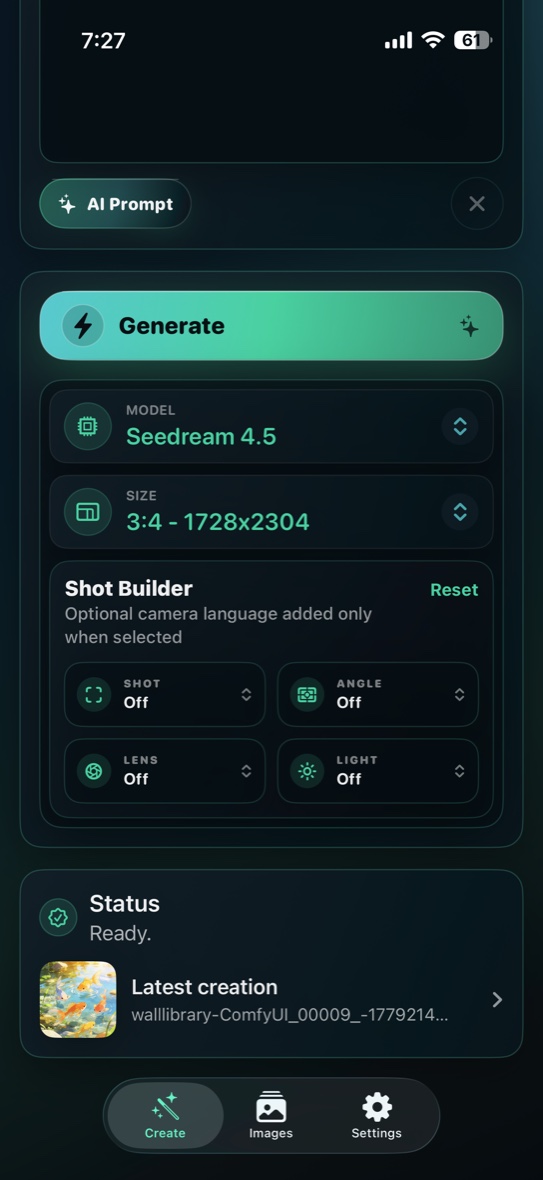
Add up to five reference images, enter your prompt, optionally use AI Prompt, choose model and size, adjust Shot Builder, then tap Generate.

DreamForge Create screen with reference slots and prompt input
AI Prompt

Use Gemini-powered help to study a reference and turn rough intent into stronger prompt language.

Model Picker

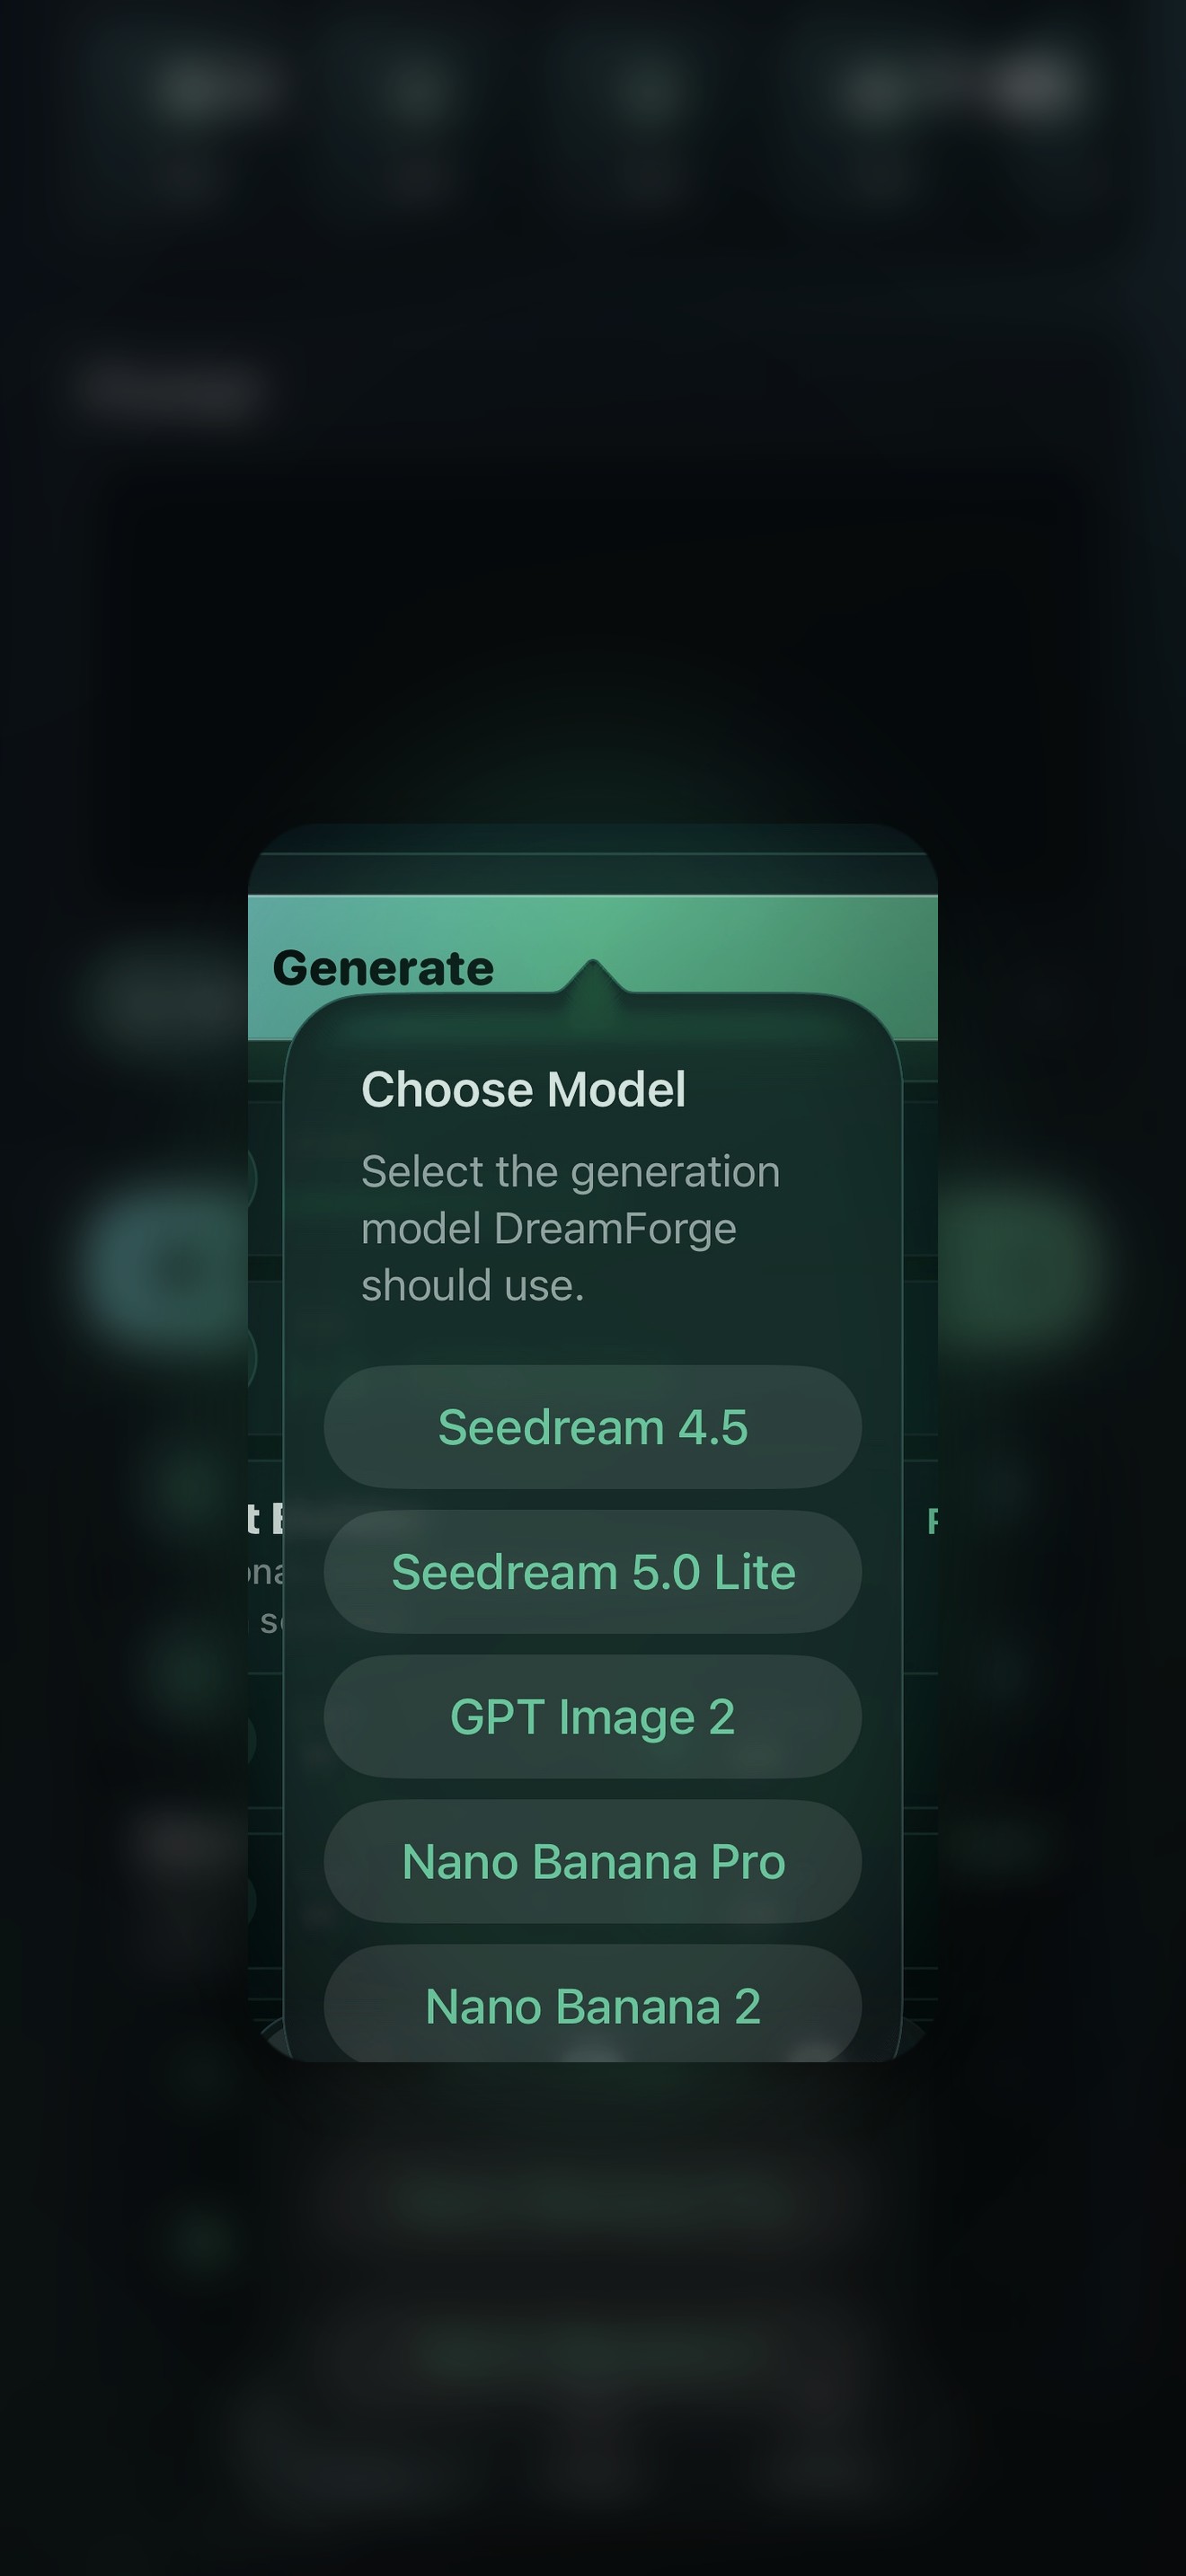
Choose supported partner-node API models without wiring node graphs by hand.

Shot Builder

Add optional camera distance, angle, lens, and lighting language only when you want it.

DreamForge Shot Builder screen DreamForge focused model picker
Manage And Preview

Keep the result moving through the loop.

Tap to preview, swipe left or right, pinch to zoom, and long press for actions. Use folders, collections, favorites, and export only when you choose.

Preview Swipe Pinch to zoom Long press Folders Collections Favorites Save to Photos
DreamForge long press action menu
DreamForge Magnific Upscaler screen
Magnific Upscaler

Refine a keeper without replacing the original.

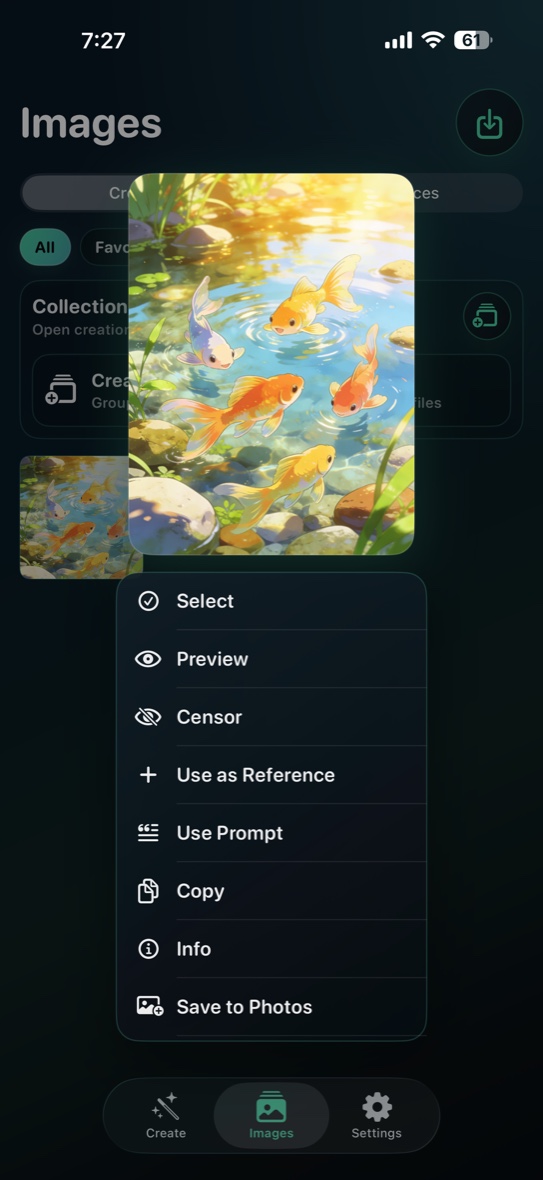
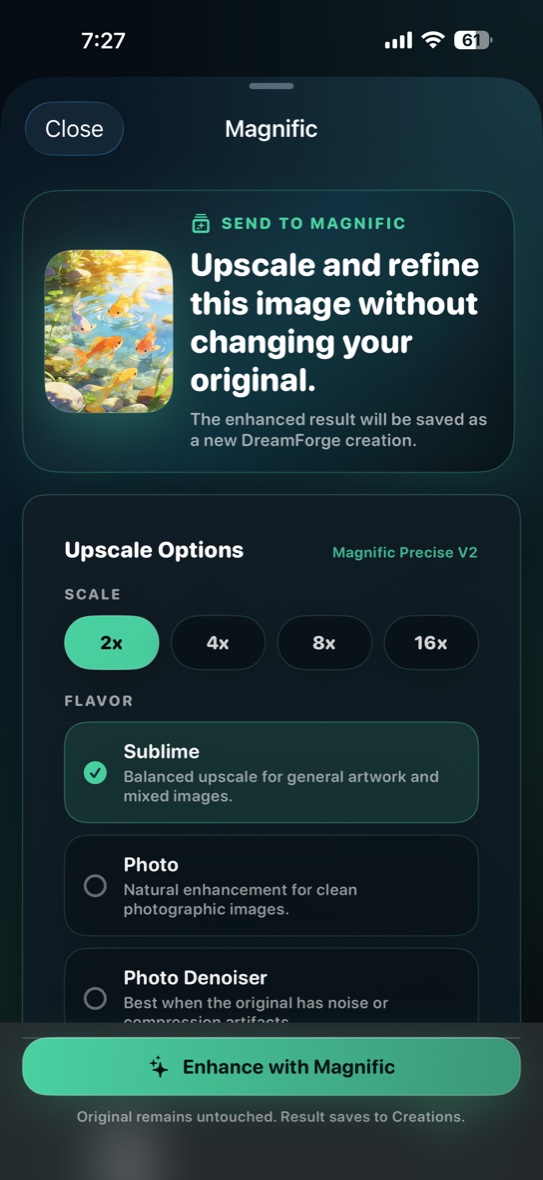
Open or long press a generated image, choose Enhance or Upscale, pick your Magnific options, and the result returns to your creations as a new image.

  1. Open or long press a generated image.
  2. Choose the Magnific upscale action.
  3. Select scale and flavor options.
  4. Run the upscale through your ComfyUI setup.
  5. Review the new result in creations.
Privacy And Partner APIs

Know where selected prompts and images go.

DreamForge sends selected prompts and selected reference images to the ComfyUI server configured by the user. If the ComfyUI workflow uses partner API nodes such as OpenAI/ChatGPT-style image services, Magnific, Seedream, Gemini/Nano Banana, or other commercial API providers, that workflow may upload the selected prompt and images to the provider's servers for generation or enhancement. This is normal for commercial AI APIs. Users who want fully local generation should use local ComfyUI workflows that do not call external API nodes.

  • DreamForge does not auto-save generated images to Apple Photos.
  • Apple Photos import and export are user initiated.
  • API keys entered in DreamForge are stored in the iOS Keychain.
  • The developer does not operate the user's ComfyUI server by default.
Troubleshooting

Fast checks for common issues.

Most problems come down to server reachability, local network permission, Tailscale routing, API keys, or a ComfyUI workflow error.

Could not reach ComfyUI
  • Confirm ComfyUI is running.
  • Start it with --listen 0.0.0.0.
  • Use a full URL with http:// and :8000.
  • Open the same URL in Safari on the iPhone or iPad.
  • Avoid http://127.0.0.1:8000 on a real device.
Safari works but DreamForge does not
  • Match the DreamForge URL to Safari exactly.
  • If using Tailscale, enable Remote Access.
  • Select Tailscale as the route.
  • Tap Test again and use Copy Diagnostics if it still fails.
Wi-Fi scan does not find server
  • Wi-Fi scanning checks only the local network.
  • Enter the Mac's local IP manually if scan misses it.
  • Confirm both devices are on the same Wi-Fi.
  • Confirm Local Network permission is enabled for DreamForge.
Tailscale does not work
  • Confirm Tailscale is connected on the Mac.
  • Confirm Tailscale is connected on the iPhone or iPad.
  • Open http://YOUR_TAILSCALE_IP:8000 in Safari first.
  • Enable Remote Access and choose Tailscale in DreamForge.
Not authorized or API key errors
  • Check the API key entered in DreamForge.
  • Check any keys stored directly in ComfyUI custom nodes.
  • Confirm the selected model uses the provider account you expect.
  • Test the workflow inside ComfyUI if possible.
Generation starts but no image appears
  • Check the ComfyUI console for node errors.
  • Look for missing custom nodes or model files.
  • Confirm the output folder is writable.
  • Try fewer reference images if the workflow has a limit.
Wi-Fi Import page does not open
  • Confirm Wi-Fi Import is running in DreamForge.
  • Use another device on the same Wi-Fi network.
  • Copy the address exactly.
  • Keep the iPhone or iPad awake during the import session.
Some files failed during import
  • Check the Needs Review count on the import page.
  • Use JPG, JPEG, PNG, HEIC, HEIF, or WEBP.
  • If a file fails, export it as PNG or JPEG and try again.

Still stuck?

Send a note to support@eventide-labs.com and include your server route, whether you are on Wi-Fi or Tailscale, and what the Test button says.